 how-to
How to Install a Residential Floor Safe: Step-by-Step Guide
Table of Contents
- What You'll Need Before Starting
- The Best Place to Install a Floor Safe in Your Home
- How to Install a Floor Safe in Concrete
- How to Install a Floor Safe in a Wood Floor
- Positioning, Leveling, and Securing Your Safe
- Moisture, Flooding, and Corrosion Prevention
- Permits, Building Codes, and When to Call a Professional
- Common Mistakes to Avoid During Installation
- Frequently Asked Questions
Last Updated: October 12, 2026
What You'll Need Before Starting
Learning how to install a residential floor safe requires careful planning and the right tools. Before you dig, cut, or position anything, gather what you'll need and assess whether your home's structure can handle the job.
Start by getting the essential tools together. You'll need a level, tape measure, marking pencil, and safety gear including gloves and eye protection. For concrete floors, rent a concrete saw or jackhammer from a local equipment rental shop.
Beyond tools, prepare your workspace. Clear the area around your installation site. Remove furniture, rugs, and anything else that could get damaged. Lay down drop cloths to contain dust and debris.
Check your safe's dimensions and weight before you start any work. Most residential floor safes range from 200 to 500 pounds. Verify your safe fits through doorways and hallways on its path to the installation location.
Finally, consider whether you need permits. Building codes vary by jurisdiction, and some areas require inspections for structural modifications. Calling your local building department takes 15 minutes and prevents costly mistakes later.
The Best Place to Install a Floor Safe in Your Home
Location determines whether your floor safe stays secure and accessible for decades. The best place balances three factors: security, accessibility, and structural suitability.
Choose a location that's not obvious to casual visitors. Avoid installing a floor safe directly in front of the master bedroom closet or under a dining table, thieves look there first. A hallway closet, basement corner, or utility room works better because it doesn't draw attention. The goal is to hide the safe in plain sight as just another part of your home's layout.
Accessibility matters too. You need to reach your safe without moving heavy furniture or crawling through tight spaces. A location you can access in under a minute is ideal. If your safe becomes a hassle to reach, you might avoid using it, defeating the purpose entirely.
Pre-Installation Checks: Utilities, Radiant Heat, and Slab Type
Before marking where to cut, identify what's beneath the floor. Call your utility locating service, usually free in most areas, to mark water lines, gas pipes, and electrical conduits. Cutting through a live electrical wire or gas line isn't just dangerous; it's a code violation that can void your homeowner's insurance.
Check whether your concrete slab is post-tensioned. Many modern homes use post-tension slabs for added strength. These slabs contain steel cables under extreme tension. Cutting into one can cause the slab to crack or even collapse.
Identify whether you have radiant floor heating. If your slab contains heating pipes, cutting through them means losing heat to that room and potentially damaging the heating system. Ask your HVAC contractor or check your home's mechanical plans.
Determine your slab type. A standard concrete slab is straightforward to work with. A slab over a crawlspace or basement is different, you'll have clearance beneath to work. Wood-frame floors require a different approach entirely. Knowing your structure before you start saves time and prevents damage.
How to Install a Floor Safe in Concrete
Installing a floor safe in concrete involves excavation, base preparation, positioning, and securing. This process takes a full day for most homeowners.
Start by measuring your safe's footprint. Add 2 inches on all sides for working room. Mark this outline on your concrete with a chalk line or marking pencil. Double-check your measurements before cutting, you can't undo a cut in concrete.
Marking and Cutting the Opening
Use a concrete saw to cut along your marked lines. Rent a wet saw from an equipment rental shop, it controls dust and cuts cleanly. If you use a dry saw, wear a respirator; concrete dust contains silica, which damages lungs. Cut to a depth that matches your safe's height plus 2 inches for the base layer.
If your safe is smaller, use a jackhammer to break up the concrete inside the marked area. This is faster than sawing but messier. Wear ear protection and eye protection, concrete chips fly everywhere. Break the concrete into manageable pieces, then shovel them into a wheelbarrow.
Once you've removed the concrete, clean out all dust and debris from the hole. A shop vacuum works well. You need a clean surface for the next step.
Excavation Depth and Base Preparation
Dig out the soil beneath the concrete opening. Your goal is to create a level base below the safe. Most floor safes need 4 to 6 inches of clearance beneath them for drainage and settling. Dig deeper if you're in an area prone to flooding or moisture issues.
Compact the soil at the bottom of the excavation. Loose soil can shift over time, causing your safe to settle unevenly. Use a hand tamper or the back of a shovel to compress the soil firmly.
Lay down a drainage layer. Spread 2 to 3 inches of gravel at the bottom of the hole. This allows water to drain away from the safe rather than pooling beneath it. Compact the gravel lightly.
Add a concrete base layer on top of the gravel. Pour a 2-inch concrete pad and level it. This gives your safe a stable, durable surface. Let the concrete cure for 24 hours before placing the safe.
How to Install a Floor Safe in a Wood Floor
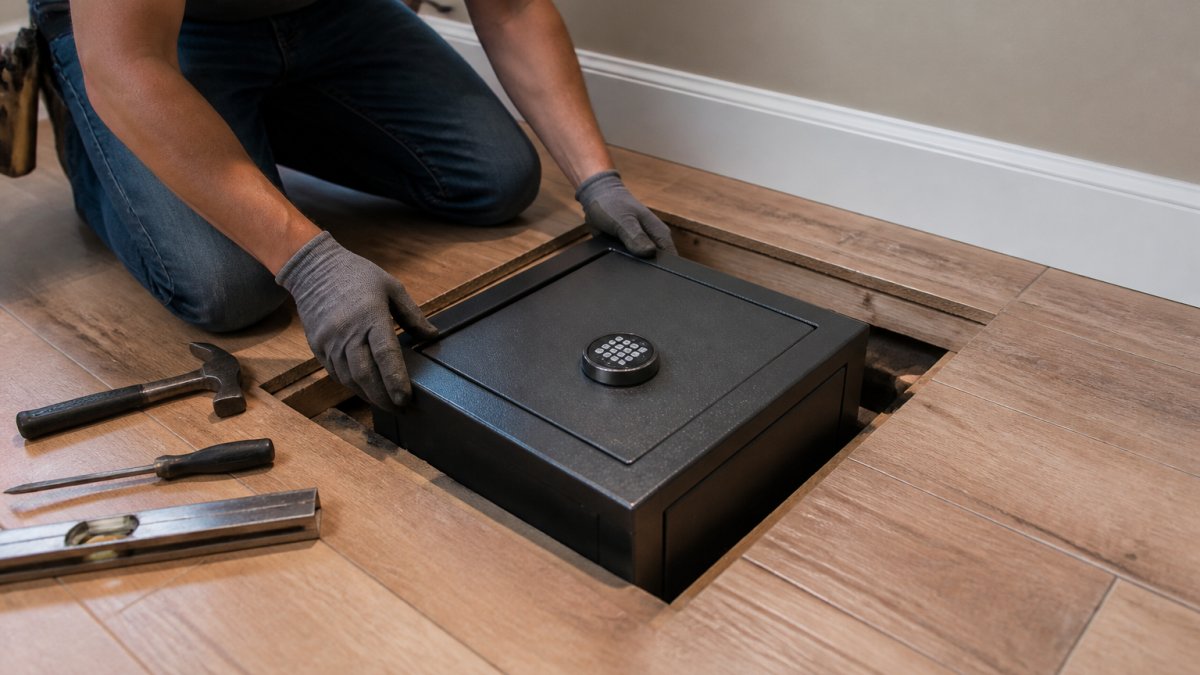
Wood floors require a different approach because you can't dig beneath them. Instead, you'll cut through the flooring and potentially the subfloor to create an opening.
Locate floor joists using a stud finder. Your safe must sit on a joist or be supported by additional framing, it's too heavy to hang between joists. Mark the joists and plan your opening around them.
Cut through the finished flooring and subfloor using a reciprocating saw or jigsaw. Create an opening slightly larger than your safe's footprint. Remove the cut pieces and clear the debris.
Install a support frame if needed. If your safe doesn't sit entirely on joists, add 2x10 or 2x12 lumber perpendicular to the joists to create a solid support platform.
Place plywood or OSB around the safe opening to create a level floor surface. The safe should sit flush with or slightly below the surrounding floor. Finish the edges with trim to match your flooring.
Understanding how to install a residential floor safe in wood is more complex than concrete because it involves structural considerations.
Positioning, Leveling, and Securing Your Safe
Once your base is ready, position the safe carefully. This step determines whether your safe operates smoothly for decades or sticks and binds.
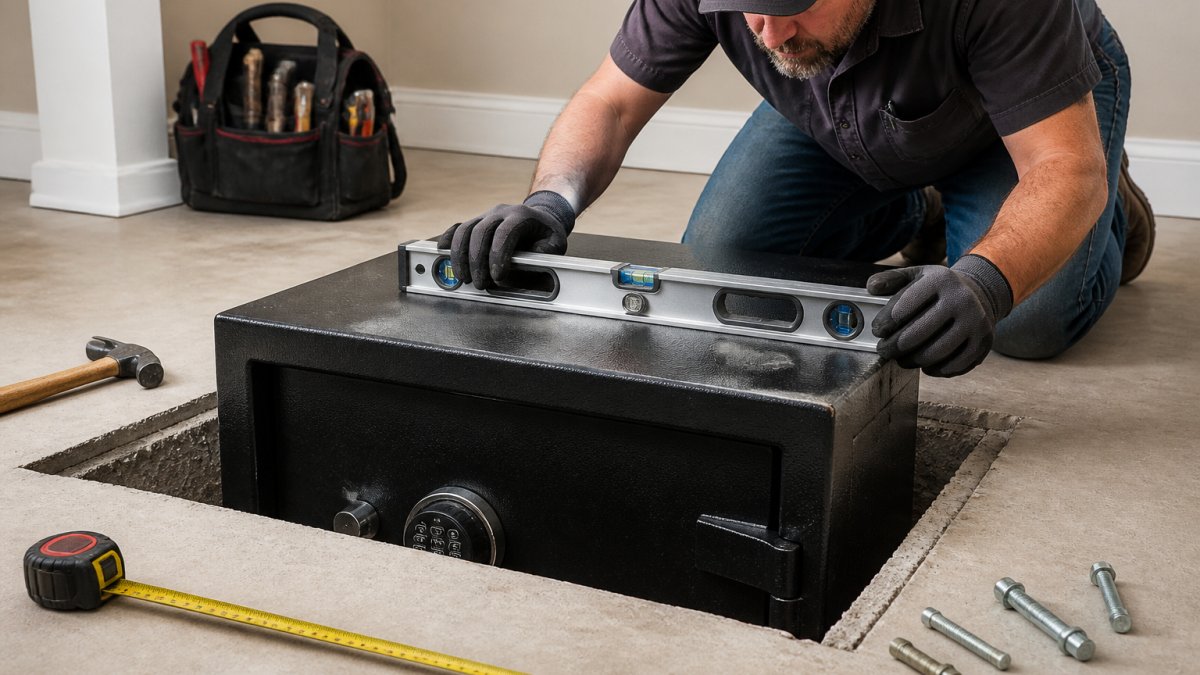
Slide the safe into the opening. If it's too tight, sand the edges of the opening slightly. The safe should slide in with gentle pressure but not force.
Place a level on top of the safe in two directions, front to back and side to side. Adjust shims (thin metal or plastic wedges) under the safe until the bubble reads perfectly level.
Once level, secure the safe to the floor. Most floor safes have anchor bolt holes on the bottom. Use concrete anchors or bolts appropriate to your floor type.
Fill the gap around the safe with concrete or epoxy filler. This prevents debris from falling around the safe and anchors it firmly in place.
Test the door operation before finalizing installation. Open and close it several times. The door should swing smoothly without binding or catching. If it sticks, the safe isn't level, readjust shims and test again.
Moisture, Flooding, and Corrosion Prevention
Moisture is the enemy of floor safes. Water inside a safe ruins documents, corrodes metal, and promotes rust on the locking mechanism.
Prevent moisture by choosing a location above the typical water table. Basements in flood-prone areas are risky. If your only option is a basement, install a sump pump system and ensure proper drainage around your home's foundation.
Create a moisture barrier around the safe. After positioning and leveling, apply a waterproof sealant around the safe's perimeter before filling gaps with concrete. This prevents water from seeping around the edges.
Inside the safe, use silica gel packets or a small dehumidifier designed for safes. Replace silica gel every few months in humid climates.
Ensure your safe has proper drainage. Most quality floor safes have drain holes on the bottom. Keep these clear of debris and concrete. If water does enter, it can drain out rather than pooling inside.
In flood-prone areas, consider anchoring the safe deeper or installing it on a raised platform. A safe that floats away during a flood is worse than useless.
Permits, Building Codes, and When to Call a Professional
Building codes exist to protect your home's structural integrity. Some jurisdictions require permits for modifications that affect your foundation or floor structure.
Call your local building department before starting. Explain that you're installing a floor safe. Ask whether a permit is required and whether an inspection is needed. Many areas allow homeowner-installed safes without permits, but some don't.
If your home has post-tension concrete, stop and hire a professional. Cutting into post-tension slabs requires specialized knowledge and equipment. A professional can identify the cable locations and work safely around them.
If you're uncertain about joist capacity in a wood floor installation, hire a structural engineer for a brief consultation. The cost is modest compared to the risk of a floor that sags or fails.
Consider hiring a professional locksmith if you're uncomfortable with any step. At SOUTHMIAMILOCKSMTIH.COM, we handle floor safe installations regularly and can ensure the job is done correctly.
Professional installation costs more than DIY, but it guarantees the safe works properly and your home's structure remains intact.
Common Mistakes to Avoid During Installation
The most common mistake is skipping the utility locating step. Cutting into a live wire or gas line is dangerous and expensive.
Don't install a floor safe in a post-tension slab without professional help. This is the second most common mistake, and it can crack your foundation.
Avoid installing in locations prone to flooding or high moisture. A safe full of water is worthless. Choose a dry location or waterproof thoroughly.
Don't skip the leveling step. An unlevel safe binds and doesn't secure properly. Take time to get it right.
Avoid cutting the opening too large. A sloppy opening makes it hard to seal and leaves gaps for water and pests. Measure twice, cut once.
Don't use the safe immediately after installation. Let concrete cure fully, usually 7 days, before storing valuables.
Finally, don't assume you can do this alone if your home has unusual construction. Crawlspaces, radiant heating, post-tension slabs, and other complications require professional judgment.
Installing a residential floor safe is manageable for homeowners with basic tool skills and the right preparation.
Frequently Asked Questions
Can you install a floor safe in an existing home?
Yes, floor safes can be installed in existing homes, though the process depends on your floor type. Concrete slab homes require cutting and excavation, which is more involved than wood-frame floors. Before starting, verify there are no utilities, radiant heating lines, or post-tension cables beneath the planned location. If you're unsure about your floor construction or what lies underneath, a professional inspection is worth the investment to avoid costly damage.
What should you check before cutting into a floor to install a safe?
Before cutting, locate all utilities running through your floor: electrical wiring, plumbing, gas lines, and HVAC ducts. Check for radiant heating systems common in modern homes. If you have a post-tension concrete slab, professional structural approval is essential, cutting into these slabs can release tension and cause cracking. Use a stud finder or hire a professional to scan the area. Verify the safe's footprint and depth requirements fit your floor structure and clearance needs.
How do you keep a floor safe from moisture?
Moisture is a major threat to floor safes, especially in basements or areas prone to flooding. Create a moisture barrier by placing gravel or sand beneath the safe to allow drainage. Apply waterproof sealant around the safe's edges and consider a dehumidifier in the room. If you live in a flood-prone area, install the safe above the expected flood level or use a submersible safe designed for water exposure. Regular inspection and maintenance of the surrounding area help prevent water accumulation.
Do you need a professional to install a floor safe?
Professional installation is recommended, especially for concrete floors or post-tension slabs. Improper excavation can damage structural integrity or utilities. Professionals have the right tools, know building codes, and can verify permits if required. For wood-frame floors, experienced homeowners can manage installation with proper planning. When in doubt, particularly with utilities or structural concerns, hiring a licensed locksmith or contractor ensures the job is done safely and correctly.